Hardwood Floor Refinishing: Cost, Steps, and Pro Tips
Hardwood floors add timeless warmth and value to any home, but daily foot traffic, pets, and furniture can leave them scratched, dull, and faded. When your floors start to look tired, you do not need to replace them. Hardwood floor refinishing restores the original beauty of your wood floors by sanding away the top layer and applying fresh stain and finish. This process can make your floors look brand new, often for a fraction of the cost of replacement, and it is a smart investment for both your home’s appearance and its resale value.
In this guide, we will walk you through everything you need to know about hardwood floor refinishing: when to refinish, the full process, cost factors, DIY vs. professional work, and how to choose the right contractor. We will also highlight how a lead generation platform like HomeRemodelingLeads can help you find vetted flooring professionals in your area, saving you time and stress.
Signs Your Hardwood Floors Need Refinishing
Not every scratch or dull spot means you need a full refinish. Understanding the difference between surface wear and deep damage will help you decide when to act. Look for these common signs that your floors are ready for refinishing:
- Water stains or dark spots that do not wipe away, indicating the finish has worn through.
- Deep scratches or gouges that catch your fingernail, exposing bare wood.
- A dull, hazy appearance even after cleaning, meaning the topcoat has worn thin.
- Cracks or gaps between boards that collect dirt and are hard to clean.
If you notice these issues, your floors likely have finish damage, not just surface dirt. Refinishing removes the damaged top layer and reseals the wood, protecting it for years to come. However, if your floors have severe structural issues, like rotting boards or insect damage, you may need to replace some planks before refinishing.
Another key sign is the age of your floor’s finish. Most polyurethane finishes last between 5 and 10 years, depending on traffic and maintenance. If your floors have not been refinished in that time frame and show wear, it is wise to schedule refinishing proactively, rather than waiting for the wood to become exposed and incur more damage.
Refinishing vs. Replacing: What Is the Right Choice?
Many homeowners assume that worn floors must be torn out and replaced. That is rarely true. Hardwood floor refinishing is almost always more cost-effective and less disruptive than full replacement. Refinishing costs typically range from $3 to $8 per square foot, depending on your location and the condition of the floors. In contrast, replacing hardwood floors costs between $12 and $25 per square foot, including materials and labor. For a 1,000-square-foot space, that difference can be thousands of dollars.
Replacement is only necessary when the wood itself is beyond saving: for example, if there are large gaps, severe water damage, or if the boards are too thin to sand again. If your floors are solid hardwood with at least 1/8 inch of wood above the tongue, you can usually refinish them multiple times. Engineered hardwood, which has a thin real-wood veneer, can often be refinished once or twice, depending on the veneer thickness.
So, before you call for replacement estimates, consult a professional to assess your floors. A simple refinish can transform your space and save you money, which you can then invest in other home improvements. If you are unsure about your floor type, a contractor can inspect it and give you an honest recommendation. HomeRemodelingLeads connects you with flooring specialists who can evaluate your floors and provide accurate quotes, so you can make an informed decision.
The Hardwood Floor Refinishing Process
Understanding the refinishing process helps you know what to expect and how to prepare. Professional refinishing typically takes 3 to 5 days, including drying time. Here is a step-by-step breakdown of what happens:
Step 1: Inspection and Preparation
The contractor first inspects the floors for damage, checks the wood thickness, and identifies any issues like loose boards or protruding nails. Then, they prepare the room: moving furniture, removing baseboards or protecting them, and covering doorways to contain dust. You will need to empty the room or at least clear a path, and you should remove curtains and small items from shelves to minimize dust collection.
Step 2: Sanding
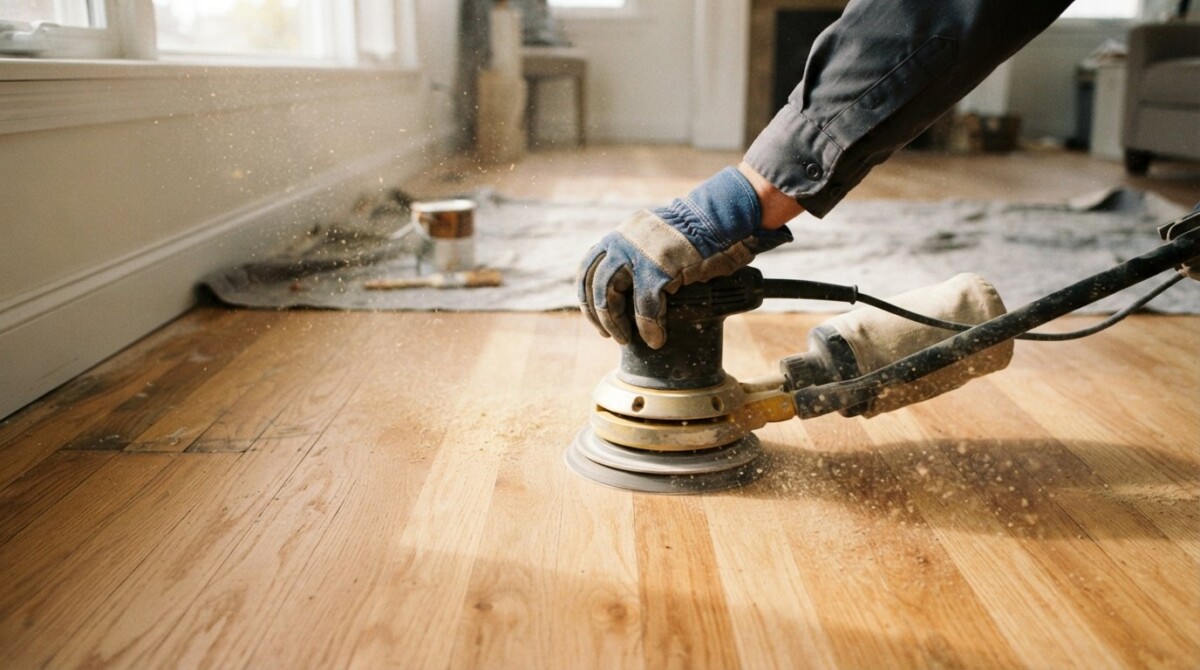
Sanding is the most critical step. The contractor uses a drum sander for the main floor area and an edger for corners and edges. They start with coarse-grit sandpaper to remove the old finish and smooth out scratches, then move to finer grits to achieve a smooth, even surface. This process removes the top layer of wood, so it is essential to sand in the direction of the wood grain to avoid cross-grain scratches.
Dust control is a major concern. Many professionals use vacuums attached to sanders to minimize dust, but some dust is inevitable. Make sure you discuss dust control measures with your contractor before work begins. After sanding, the floor is vacuumed and wiped down to remove all dust, because any remaining particles will show under the new finish.
Step 3: Staining (Optional)
If you want to change the color of your floors, this is the time. Staining is applied with a brush or rag and allowed to penetrate the wood for a few minutes before wiping off the excess. You can choose a stain that matches your existing décor or go for a completely new look. Darker stains hide scratches better, while lighter stains make a room feel more spacious. If you prefer a natural look, you can skip the stain and apply a clear finish directly to the wood.
It is wise to test a few stain colors on a hidden area, like inside a closet, to see how they look on your specific wood type. Remember that the final color also depends on the topcoat, so ask your contractor for a sample board that shows the exact combination.
Step 4: Applying the Finish
The finish is applied in multiple coats, usually two to three layers. Water-based polyurethane dries faster and has less odor, while oil-based polyurethane offers a warm amber tone and is more durable. The contractor applies each coat with a roller or brush, allowing the recommended drying time between coats. After the final coat, the floor needs at least 24 to 48 hours to cure before you can walk on it, and up to a week before moving furniture back.
Some contractors offer special finishes like matte or satin, which provide a low-sheen look that hides imperfections. Glossy finishes are durable but show scratches more easily. Discuss your lifestyle and preferences with your contractor to choose the best finish for your home.
Step 5: Final Inspection and Curing
Once the finish has dried, the contractor inspects the floors for any missed spots or imperfections. They may do a light buffing between coats to ensure a smooth result. After the final inspection, you need to allow the floors to cure fully. During this time, avoid heavy furniture, high heels, or pet nails that could dent the soft finish. Follow the contractor’s guidance on when it is safe to resume normal use.
Cost Breakdown: What Affects the Price?
The cost of hardwood floor refinishing varies widely based on several factors. Understanding these can help you budget and avoid surprises. Here are the main cost drivers:
- Square footage: Larger areas cost more, but the per-square-foot rate often decreases for bigger jobs.
- Wood type and condition: Exotic woods or floors with heavy damage require more labor and materials.
- Number of coats and finish type: Premium finishes and additional coats increase cost.
- Location: Labor rates vary by city and region; urban areas tend to be pricier.
- Staining: Adding a custom stain adds to the cost, typically $1 to $2 per square foot extra.
On average, homeowners pay between $1,800 and $4,000 for a 1,000-square-foot area. However, you can get an accurate quote only after a contractor inspects your floors. Be wary of unusually low estimates, as they may indicate subpar materials or rushed work. Also, ask for a detailed written quote that includes sanding, staining, finish, and any repairs.
It is also wise to consider the long-term value. Refinishing your hardwood floors can increase your home’s resale value by several thousand dollars, and it costs much less than replacement. In addition, a well-maintained floor lasts decades, making this a worthwhile investment for your property.
DIY vs. Professional Refinishing: What You Need to Know
Some homeowners consider refinishing their floors themselves to save money. While DIY is possible, it is not for the faint of heart. Sanding machines are heavy and difficult to maneuver, and one mistake can leave permanent swirl marks or gouges. The process also generates a huge amount of dust, which can spread throughout your home and settle into every crevice. You need to rent equipment, buy sandpaper and finish, and spend days on hands and knees. In the end, DIY refinishing often costs more than expected when you factor in equipment rental, materials, and your own time, and the results may not match professional quality.
Professional refinishers have the experience, specialized equipment, and dust control systems to deliver a smooth, even finish that lasts. They also know how to handle tricky areas like stairs, closets, and transitions between rooms. A professional can spot issues you might miss, such as water damage or loose boards, and fix them before they become bigger problems.
If you do decide to attempt DIY, at least for a small room, be sure to watch plenty of tutorials and start with a less visible area. But for most homeowners, hiring a professional is the safer and more reliable choice, especially for larger spaces or if you want a flawless result. You can find trusted contractors through referral from friends or by using an online lead service like HomeRemodelingLeads, which connects you with vetted flooring professionals in your area.
How to Choose the Right Flooring Contractor
Choosing the right contractor is the difference between a beautiful floor and a costly disaster. Here are key steps to vet potential professionals:
- Ask for references and check reviews on sites like Google, Yelp, or the Better Business Bureau.
- Verify that the contractor is licensed and insured, including liability and workers’ compensation.
- Get at least three written quotes that detail the scope of work, materials, and timeline.
- Ask about their experience with your specific wood type and finish preference.
- Inquire about dust control measures and how they protect your home during the job.
Once you have a shortlist, ask each contractor for a walkthrough and a detailed proposal. Pay attention to how they communicate: if they are vague or pushy, that is a red flag. A trustworthy contractor will be happy to explain the process and answer your questions. Also, check whether they offer a warranty on labor and materials, which gives you peace of mind in case of issues after the job.
Using a lead generation service like HomeRemodelingLeads simplifies this process. You submit your project details, and the platform matches you with pre-qualified contractors who are actively looking for work. This saves you from cold-calling and gives you a shortlist of professionals ready to bid. HomeRemodelingLeads vets the contractors, so you can focus on comparing quotes rather than worrying about legitimacy.
Preparing Your Home for Refinishing
Proper preparation ensures a smooth refinishing process and protects your belongings. Here is a checklist to follow before the crew arrives:
- Move all furniture out of the room, including large pieces like pianos or bookshelves.
- Remove curtains, blinds, and wall art to prevent dust accumulation.
- Clear closets and storage areas that open into the room.
- Make sure the contractor has access to electrical outlets and water if needed.
- Plan to be away from home for the first 24 to 48 hours to avoid inhaling fumes.
During the sanding process, dust and noise are unavoidable. Even with professional dust control, some particles will drift. Cover doorways with plastic sheeting and turn off your HVAC system to minimize spreading dust through the house. After the job, you may need to clean the entire home to remove fine dust that settles in unexpected places.
Also, plan for the curing time. You will not be able to walk on the floors for at least a day, and you should wait several days before moving furniture in. If you have pets, keep them off the floors for the recommended period to avoid prints or scratches. Ask your contractor for a detailed timeline so you can arrange your schedule accordingly.
Maintaining Your Refinished Floors
After investing in hardwood floor refinishing, you want to protect that beauty for as long as possible. Regular maintenance is simple, but it requires consistency. Here are some best practices:
- Sweep or vacuum at least once a week to remove grit that scratches the finish.
- Damp mop with a hardwood floor cleaner (never water alone, as it can damage wood).
- Place doormats at entrances to reduce dirt and moisture tracked in.
- Use felt pads under furniture legs and avoid walking on floors with high heels or cleats.
- Wipe up spills immediately, especially water and acidic liquids like wine or lemon juice.
If you notice light scratches over time, you can often use a touch-up marker or a floor polish to minimize them. However, deep scratches or worn areas may require a spot repair, which is best done by a professional to blend with the existing finish. Avoid using steam mops or harsh chemicals, as these can strip the finish and void your warranty.
With proper care, your refinished floors can last 10 to 20 years before needing another coat. Regular maintenance also keeps your floors looking beautiful and adds to your home’s overall appeal. If you are unsure about the best cleaning products for your finish, consult your contractor for recommendations.
Final Thoughts on Hardwood Floor Refinishing
Hardwood floor refinishing is a cost-effective, eco-friendly way to rejuvenate your home’s interior. By understanding the signs of wear, the refinishing process, and the cost factors, you can make an informed decision that saves you money and adds value to your property. Whether you choose to DIY or hire a professional, the key is to plan carefully and choose a contractor you trust.
If you are ready to transform your floors, start by getting quotes from reputable professionals. HomeRemodelingLeads can connect you with vetted flooring contractors in your area who specialize in hardwood refinishing. Submit your project details today and receive competitive bids from local experts, making it easy to find the right fit for your home and budget. Your floors will thank you, and so will your future self every time you walk across that beautiful, refreshed surface.
About the Author: Lila Kensington