
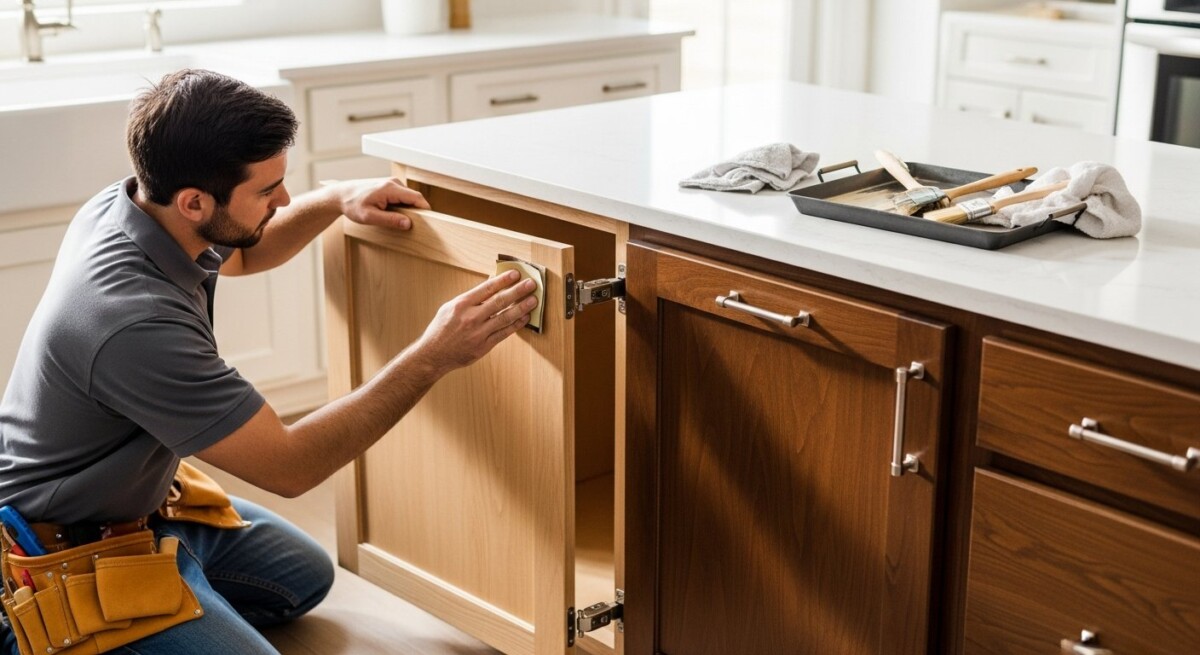
Cabinet Refinishing and Repair: Save Thousands in 2026
Your kitchen cabinets take a beating. Every day, they face heat, moisture, grease, and the constant pull of cabinet doors and drawers. Over time, that wear shows up as faded finishes, chipped edges, stuck drawers, and hinges that wobble. Many homeowners assume the only fix is a full replacement, which can cost tens of thousands of dollars. But there is a smarter path: cabinet refinishing and repair. This approach restores the beauty and function of your existing cabinets at a fraction of the cost, often saving 50 to 70 percent compared to new cabinetry. In this guide, we will walk through the entire process, from assessing damage to choosing finishes, and show you how to get professional results without blowing your renovation budget.
Whether you are preparing to sell your home or simply want to enjoy your kitchen again, understanding your options matters. Cabinet refinishing and repair is not just about aesthetics. It is about extending the life of a major investment, reducing waste, and keeping your home improvement project on schedule. In the sections below, we will cover when to repair versus refinish, how to prep surfaces correctly, the best materials to use, and common mistakes to avoid. You will also learn why working with a skilled contractor, one who finds reliable projects through a service like Home Repair Leads, can make all the difference in the final outcome.
Why Choose Cabinet Refinishing Over Full Replacement?
The biggest advantage of cabinet refinishing and repair is cost. A typical kitchen cabinet replacement runs anywhere from $10,000 to $25,000 or more, depending on the size of your kitchen and the materials you select. Refinishing, on the other hand, usually falls between $1,500 and $4,500 for a standard kitchen. That is a massive difference, and the savings become even more attractive when you realize that refinishing can deliver a near-new look when done properly.
Time is another critical factor. A full cabinet replacement often takes two to four weeks, sometimes longer, because it involves demolition, carpentry, and installation. Refinishing and repair can usually be completed in three to five days, including drying time. That means less disruption to your daily routine and a faster path to enjoying your updated kitchen. Plus, refinishing is far more eco-friendly. You are not sending perfectly good cabinet boxes to a landfill, and you are avoiding the energy and resources needed to manufacture new products.
However, there are situations where replacement is the better call. If your cabinet boxes are structurally compromised, such as severe water damage, widespread rot, or warped frames, then refinishing cannot fix those issues. Similarly, if you want to completely change the layout of your kitchen, you will need new cabinets. But for the vast majority of homes with decent bones, refinishing and repair is the smart, budget-friendly choice.
Signs Your Cabinets Need Repair Before Refinishing
Before you pick up a paintbrush or call a contractor, you need to assess the condition of your cabinets. Some issues are purely cosmetic, while others indicate structural problems that require repair first. Ignoring these problems will only lead to a poor finish and wasted money. Here are the most common signs that your cabinets need more than just a new coat of paint:
- Doors that stick, rub, or no longer close properly, which often means hinge alignment or wood swelling.
- Visible water stains, dark rings, or bubbling finish near the sink or dishwasher.
- Loose or cracked joints in the cabinet frame, especially at the corners.
- Drawers that slide unevenly or feel wobbly, indicating track or roller wear.
- Peeling, chipping, or cracking of the existing finish, which prevents new paint or stain from adhering.
Once you have identified these issues, you can decide which repairs are necessary. Tightening screws, replacing hinges, and sanding down swollen edges are relatively simple fixes. More serious damage, like a cracked side panel or a drawer box that has completely come apart, may require professional woodworking skills. In any case, addressing these problems before refinishing ensures that your new finish lasts and looks flawless.
The Cabinet Refinishing and Repair Process: Step by Step
When you hire a professional or take on a DIY project, the process follows a predictable sequence. Each step is crucial, and skipping any of them can lead to peeling paint, uneven stain, or a finish that fails within months. Here is what you should expect:
Step 1: Cleaning and Degreasing
Kitchen cabinets accumulate a layer of grease and grime that is invisible to the naked eye. If you sand or paint over this residue, the new finish will not adhere properly. Start by wiping down all surfaces with a degreasing cleaner, such as a mixture of warm water and trisodium phosphate (TSP). Pay extra attention to areas near the stove and sink. Rinse thoroughly with clean water and let everything dry completely.
Step 2: Repairing Damage
Now is the time to fix the structural issues you identified earlier. Fill dents, scratches, and holes with a high-quality wood filler. For loose joints, apply wood glue and clamp the pieces together until the adhesive sets. Replace any broken hinges, drawer slides, or handles. If a cabinet door is warped, you might be able to flatten it by clamping it between two boards for a few days, but severe warping often requires a new door.
Step 3: Sanding and Priming
Sanding creates a smooth surface that allows the new finish to bond. Use a fine-grit sandpaper, around 120 to 220 grit, and sand all surfaces lightly. If you are stripping an old finish, you may need coarser grit to remove it completely. After sanding, wipe away all dust with a tack cloth. Then apply a high-quality primer. Primer is essential, especially for laminate cabinets or surfaces with stains that could bleed through. Let the primer dry fully, then lightly sand it with a very fine grit, like 320, to create an even base.
Step 4: Applying the Finish
You have two main choices for the final finish: paint or stain. Paint offers endless color options and hides imperfections well, but it requires a topcoat to protect against chips and scratches. Stain enhances the natural wood grain and gives a warm, classic look, but it is more difficult to apply evenly and offers less surface protection. For both options, apply thin, even coats. Multiple thin coats are better than one thick coat, as they reduce drips and ensure a durable finish. Use a high-quality brush or a sprayer for the smoothest results. Between coats, lightly sand with 320-grit sandpaper and remove dust.
Step 5: Reassembly and Hardware
Once the finish has cured completely, which can take 24 to 48 hours, reattach the doors and drawers. Install new hardware if you are upgrading the look. Adjust the hinges to ensure all doors align properly and close without sticking. Finally, give everything a gentle wipe down to remove any fingerprints from installation.
Throughout this entire process, precision matters. A small mistake, like a missed spot of grease or a too-thick coat of paint, can ruin the whole job. That is why many homeowners choose to hire professionals who have the experience and tools to deliver a flawless finish. If you decide to go that route, finding a trusted contractor is essential. A platform like Steps to Get Contractor Leads can help you connect with vetted professionals in your area.
Choosing the Right Finish for Your Cabinets
The finish you select will define the look and durability of your cabinets. Paint is the most popular choice for a modern update. It covers scratches and stains completely and allows you to match any color scheme. For a classic, timeless look, consider a semi-gloss or satin finish. These are easy to clean and resist moisture better than flat paints. If you have wood cabinets with attractive grain, staining is a great option. It adds depth and character, but it requires more skill to achieve an even tone, especially on larger surfaces like cabinet doors.
Another option is a glaze, which is applied over paint or stain to give cabinets a distressed or antique appearance. Glazing adds dimension but also requires a careful touch. For high-traffic kitchens, a conversion varnish or polyurethane topcoat is recommended. These finishes are incredibly durable and resistant to scratches, chemicals, and heat. They are a bit more expensive, but they extend the life of your refinishing work significantly.
If you are unsure which finish is right for your kitchen, consult a professional. They can show you samples and explain the pros and cons of each option based on your lifestyle and budget. Remember, the finish is what you will see and touch every day, so choose something that not only looks great but also stands up to real life.
Cabinet Refinishing and Repair Costs: What to Expect
Budgeting is a key part of any remodeling project. The cost of cabinet refinishing and repair varies based on the size of your kitchen, the condition of your cabinets, the type of finish, and your location. On average, homeowners spend between $1,500 and $4,500 for professional refinishing. This includes labor, materials, and supplies. If you need significant repairs, such as replacing several door fronts or rebuilding a drawer, costs can rise. But even with those extras, you are still paying far less than a full replacement.
For DIYers, the cost drops dramatically. A gallon of good quality cabinet paint runs about $50 to $100. Add primer, sandpaper, brushes, and wood filler, and you are looking at $150 to $300 in supplies. However, your time is valuable, and mistakes can be costly. A professional job offers peace of mind and a warranty on the workmanship, which is worth the extra expense for many homeowners.
To get the most accurate estimate for your project, gather quotes from multiple contractors. Be sure to ask what is included in the price, such as cleaning, repairs, primer, and topcoat. Also, check reviews and ask for references. A reputable contractor will be happy to provide them. If you are having trouble finding reliable pros, consider using a lead service that screens contractors for quality, like the ones discussed in our guide on Intelligent Lead Routing.
DIY vs. Professional: Which Is Right for You?
Cabinet refinishing and repair can be a rewarding DIY project if you have the patience and the right tools. The process is time-consuming, but it is not technically difficult for someone with basic handyman skills. However, there are some pitfalls. Achieving a smooth, streak-free finish on large surfaces like cabinet doors is challenging. You also need a well-ventilated space to work, which is not always available in a kitchen that is still in use. And if you make a mistake, fixing it can be more expensive than hiring a pro from the start.
Professionals bring experience, specialized equipment like sprayers, and a guaranteed result. They also know how to handle unexpected issues, such as discovering water damage behind a sink or a non-standard cabinet size. If your cabinets have complex details or you are using a high-end finish, professional help is worth considering. Additionally, if you are short on time or have a large kitchen, a pro can complete the job in days, not weeks.
There is also the question of value. A professional refinishing job can increase your home’s resale value by thousands of dollars. If you are planning to sell, that return on investment is hard to beat. On the other hand, a poorly done DIY job can decrease value. So, weigh your skills honestly against the potential risks.
Maintaining Your Refinished Cabinets
After investing in cabinet refinishing and repair, you want the results to last. Proper maintenance is key. Avoid abrasive cleaners and scrubbing pads, as they can scratch the finish. Instead, use a soft cloth and a mild soap solution for regular cleaning. Wipe up spills immediately, especially near the sink and dishwasher. Over time, you may notice minor scratches. You can touch these up with a matching stain marker or a small amount of paint.
Also, check the hinges and drawer slides periodically. Tighten any loose screws and lubricate moving parts with a silicone-based spray. This prevents wear and keeps your cabinets functioning smoothly. With proper care, a professional refinishing job can last 10 to 15 years, and a DIY job can last nearly as long if you used quality materials.
Finally, consider the environment. Refinishing is a sustainable choice, and by maintaining your cabinets, you are reducing the demand for new materials. That is good for your wallet and the planet.
Cabinet refinishing and repair is a proven strategy for transforming your kitchen without the heavy price tag of replacement. Whether you take on the project yourself or hire a professional, the key is proper preparation and quality materials. By following the steps outlined here, you can achieve beautiful, durable cabinets that add value to your home. And if you need help finding a contractor you can trust, remember that lead generation services like HomeRemodelingLeads can connect you with qualified experts in your area. Take the first step today and give your cabinets the new life they deserve.
About the Author: Mason Caldwell