
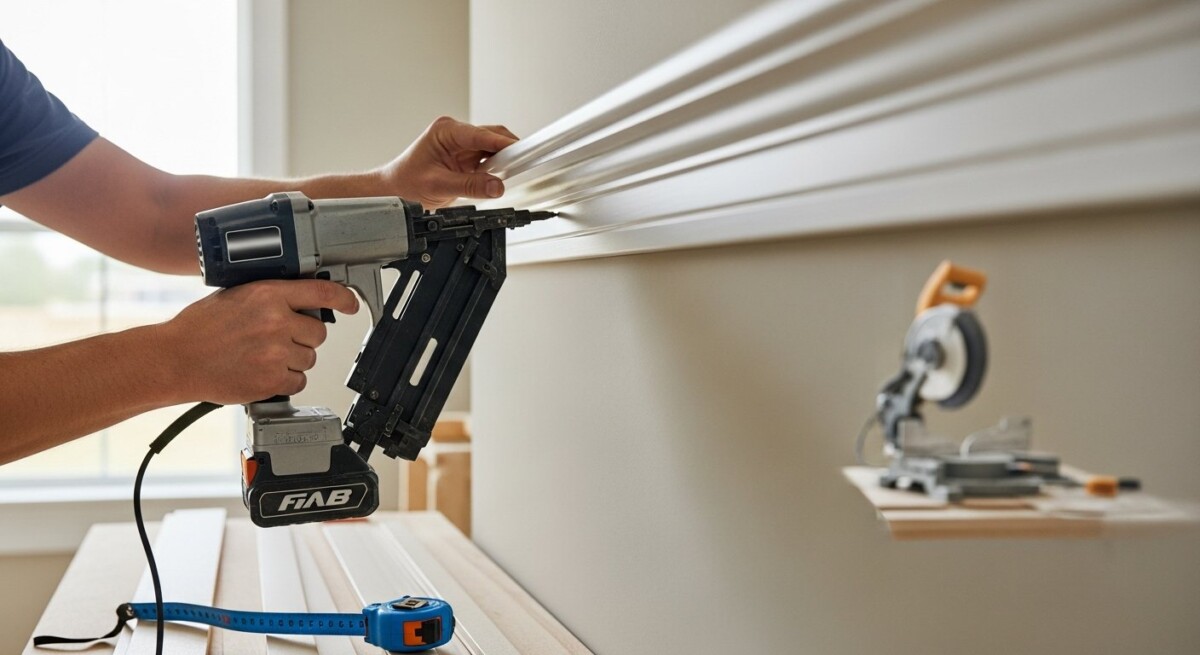
Trim or Molding Installation: Pro Secrets for Flawless Finishes
Walk into any room and your eyes will eventually land on the details that frame the space. The baseboards along the floor, the casing around a door, the crown molding where the wall meets the ceiling. These elements are not just decorative; they are the architectural jewelry of a home. When installed correctly, trim and molding elevate a room from functional to polished. When done poorly, even the most expensive paint job cannot hide the flaws. This is why Trim or Molding Installation is a skill that separates true craftsmen from mere handymen. For homeowners, understanding this process is the key to achieving a high-end look. For contractors, it represents an opportunity to demonstrate precision and secure glowing referrals.
Mastering this craft involves more than just nailing boards to walls. It requires an eye for proportion, the right tools, and the patience to execute perfect joints. Whether you are a homeowner planning a DIY weekend project or a professional contractor bidding on a new build, the principles of successful installation remain the same. This guide will walk you through the essential techniques, from material selection to the final bead of caulk, ensuring your next project stands out for all the right reasons.
Selecting the Right Materials for Your Project
Before you even pick up a saw, you need to choose the material for your trim. The decision impacts not only the look but also the durability and cost of your project. Each option offers distinct advantages, and your choice should align with the architectural style of your home and your budget. Let us break down the most common materials you will encounter.
Medium-density fiberboard, or MDF, is a popular choice for painted trim. It is stable, resistant to warping, and has a smooth surface that takes paint beautifully. Because it is an engineered product, it is also more affordable than solid wood. However, it can be susceptible to moisture damage, making it a poor choice for bathrooms or areas prone to water exposure. On the other hand, solid wood, such as pine or poplar, offers a classic, timeless appeal. Pine is softer and more prone to dings, while poplar is harder and more expensive, making it a great choice for areas that see a lot of traffic.
Polyurethane and PVC trim have gained significant popularity in recent years. These materials are rot-resistant and ideal for exterior applications or high-humidity areas like bathrooms. They are lightweight and can be cut with standard woodworking tools, although they require specific adhesives and caulks. While the upfront cost is higher than MDF, the longevity they offer often justifies the expense. For a professional installer, offering clients a choice between these materials is a standard part of the consultation process.
Understanding Profiles and Style
Beyond the material, the profile of the trim dictates the style of the room. A simple, flat profile with clean lines suggests a modern or minimalist aesthetic. In contrast, a highly detailed profile with multiple curves and steps feels traditional and ornate. When selecting profiles, consider the scale of the room. Tall ceilings can handle taller baseboards and more elaborate crown molding, while smaller rooms benefit from slimmer, simpler profiles to avoid feeling overwhelmed.
Here are a few key profiles to consider for your project:
- Baseboard: This is the trim that covers the joint between the wall and the floor. Common styles include ranch (a simple, single-board design), colonial (featuring a top detail), and Victorian (taller with intricate contours).
- Door and Window Casing: This frames your openings. It can be flat and minimal, or it can feature a back band for a layered, shadowed look.
- Crown Molding: Installed at the junction of the wall and ceiling, this is the most complex piece to install due to the compound angles required at corners.
- Chair Rail: Traditionally used to protect walls from chair backs, it now serves as a decorative transition point between different wall treatments.
Once you have selected your materials and profiles, the next step is preparation. This is arguably the most critical phase of any Trim or Molding Installation project. A level floor and straight walls are essential for a tight fit. If your walls are wavy, you will need to scribe the trim to fit the imperfections. This involves holding the board against the wall and tracing the contour of the wall onto the trim, then cutting along that line. It is a time-consuming process, but it is the difference between a mediocre job and a truly professional finish.
The Essential Toolbox for Precision Cutting
Accurate cuts are the foundation of a seamless installation. You cannot rely on guesswork or a hand saw for a professional result. Investing in the right tools will save you time, material, and frustration. The most important tool in your arsenal is the power miter saw. A compound miter saw allows you to tilt the blade and rotate the saw head simultaneously, which is essential for cutting crown molding correctly.
For most interior trim work, you will be making 45-degree angle cuts to form 90-degree corners. However, not all walls are perfectly square. This is where a digital angle finder becomes invaluable. You can measure the exact angle of the corner, divide it by two, and set your saw accordingly. This eliminates the guesswork and ensures your joints fit tightly even in older homes with settling issues. Additionally, a high-quality tape measure, a sharp pencil, and a utility knife are non-negotiable basics.
For installation, you will need a nail gun. A 16-gauge finish nailer is versatile for most trim, while an 18-gauge brad nailer is better for smaller, delicate pieces. While it is possible to use a hammer and finish nails, a nail gun speeds up the process significantly and reduces the risk of denting the wood. You will also need a good quality caulk, paintable wood filler, and a putty knife to conceal the nail holes and seams before painting. Here is a checklist to keep on hand:
- Measure and mark: Always measure the exact length needed and mark it on the board with a sharp pencil. Remember the saying: measure twice, cut once.
- Make the cut: Use the miter saw to make the precise angle cut. Always test fit the piece before applying adhesive or nails.
- Dry-fit the joint: Hold the pieces together to check for gaps. Make any necessary adjustments with a block plane or sandpaper.
- Install and secure: Apply a bead of construction adhesive to the back of the trim, then nail it into place, making sure the nails hit the studs or framing where possible.
- Fill and finish: Fill all nail holes with wood filler, run a bead of caulk along the top edge and seams, then wipe away the excess for a clean, smooth surface.
Mastering these steps will give you a repeatable process that ensures quality every time. As you gain experience, you will learn to look ahead and anticipate challenges, such as finding studs or dealing with uneven floors, before they become problems.
Handling Corners, Joints, and Scribing
The mark of a skilled installer is how they handle the transitions. Inside corners, outside corners, and scarf joints all require different techniques to look flawless. An inside corner is where two walls meet internally. The standard method is to cut one piece at a 45-degree angle and butt it into the corner, then cope the second piece to fit over the first. Coped joints are far superior to mitered inside corners because they remain tight even when the wood expands and contracts with humidity changes.
Coping involves using a coping saw to cut the profile of the first piece onto the end of the second piece. This creates a tight, overlapping joint that is virtually gap-free. While it takes practice to master, it is a skill that professional carpenters swear by. For outside corners, a simple miter joint is standard. However, you must ensure the corner is exactly 90 degrees. If it is not, you will need to adjust your miter angles accordingly, adding up to a perfect fit.
Scarf joints are used when you need to connect two pieces of trim along a long wall. Instead of a simple butt joint, which can open up over time, a scarf joint is cut at an angle, allowing the two pieces to overlap. This provides a stronger, less visible seam. To create a scarf joint, set your miter saw to a 45-degree angle and cut both pieces in the same direction. When installed, one piece will overlap the other, creating a nearly invisible line that is easily caulked and painted.
Finally, scribing is necessary when dealing with uneven floors or out-of-plumb walls. This is common in older homes. To scribe, hold the trim piece in its installed position and use a compass set to the largest gap to trace the contour of the floor onto the trim. Then, cut along that traced line with a jigsaw. This results in a custom fit that follows the floor perfectly, eliminating unsightly gaps that would otherwise be visible.
Marketing Your Services and Finding Work
For professional contractors, having the technical skill is only half the battle. The other half is finding clients who need those skills. In a competitive market, standing out is crucial. Your portfolio is your best sales tool. Before and after photos of your Trim or Molding Installation projects can be incredibly persuasive. They show potential clients the quality of your workmanship and your ability to transform a space.
However, many contractors struggle with the business side of things. Spending hours on marketing takes time away from actual installation work. This is where lead generation services come into play. Instead of cold-calling or relying solely on word-of-mouth, you can invest in pre-qualified leads. These are homeowners who have actively expressed a need for your services. They are not just browsing; they are ready to hire.
By partnering with a platform like HomeRemodelingLeads, you can focus on what you do best: the craft. The service connects you with high-intent customers in your area who are specifically searching for trim and molding installation or broader remodeling projects. This eliminates the guesswork of marketing and ensures you are spending your time on jobs that are ready to move forward. It is a strategic way to grow your business without increasing your overhead, allowing you to maximize your recovery and keep your schedule full.
When you do land a job, communication is key. Explain the process to your clients, manage their expectations regarding timelines, and deliver a flawless finish. A happy client is likely to refer you to friends and family, creating a cycle of steady work. Combining excellent craftsmanship with smart business strategies like lead buying is the formula for long-term success in the remodeling industry.
Perfecting the art of Trim or Molding Installation takes time, but the payoff is immense. Whether you are adding value to your own home or delivering a high-end finish for a client, the attention to detail is what counts. From the initial selection of materials to the final caulk line, every step matters. By mastering these techniques and building a reliable business pipeline, you can ensure that your work not only meets expectations but exceeds them, turning ordinary rooms into extraordinary spaces.
About the Author: Lila Kensington