Cabinet Installation: A Contractor’s Guide to Accuracy
Cabinet installation can make or break a kitchen or bathroom remodel. Even the finest cabinetry will look off-center, bind at the doors, or fail inspection if the installation is rushed. For contractors, this is not just about avoiding callbacks. It is about protecting margins, building a reputation, and winning referrals. Homeowners, on the other hand, want to know what separates a professional job from a DIY disaster. This guide covers both perspectives, with a focus on the proven methods that lead to precise, durable, and profitable cabinet installation work.
The demand for kitchen and bathroom remodeling continues to grow, and with it, the need for skilled installers. But skill alone is not enough. You need a repeatable process, the right tools, and a clear understanding of the building envelope. Whether you are replacing a single vanity or fitting a full run of custom cabinets, the principles are the same: measure twice, shim level, and secure to structure, not just to drywall. Let’s walk through the entire process from preparation to final adjustment.
Pre-Installation Planning and Measurement
Before a single screw is driven, the job must be planned on paper and on site. Proper measurement is the foundation of a successful cabinet installation. A quarter-inch error in the corner can multiply into a visible gap at the end of a run. Begin by verifying the floor is level. Use a long level or a laser level to check the high and low spots across the entire footprint. Record these measurements. They will guide your shimming strategy later.
Next, confirm the walls are plumb and square. Most walls are not perfectly true, especially in older homes. If a wall bows outward by half an inch in the middle, your cabinets will not sit flush unless you plan for it. You have three options: scribe the cabinets to the wall, shim the gap and cover it with a filler strip, or adjust the cabinet boxes during assembly. The best choice depends on the cabinetry type and the size of the gap. For frameless cabinets, a small shim gap is acceptable if covered by a scribe molding. For face-frame cabinets, you can often adjust the frame to match the wall.
Finally, check the ceiling height. Standard cabinets are 30, 36, or 42 inches tall, but soffits or bulkheads can change the required dimensions. If the ceiling is sloped or the floor is uneven, you may need to cut filler strips or order custom sizes. Always measure the actual space, not the plan dimensions. A laser distance measurer is useful here, but a steel tape and a straightedge are still essential. Write down every measurement, including window and door casings, outlets, and plumbing stub-outs. These obstructions will dictate where the cabinets can go and how they must be notched or scribed.
Tools and Materials for a Professional Finish
Having the right tools on hand prevents delays and poor workmanship. You do not need a workshop on wheels, but your truck should carry a core kit that covers most situations. Here is a short list of what we consider non-negotiable:
- A 24-inch and 48-inch level, plus a 6-inch torpedo level for tight spots.
- A laser level with a self-leveling feature for long runs and vertical alignment.
- Shims in both cedar and plastic, plus a sharp utility knife to trim them flush.
- A cordless drill/driver with a clutch, a right-angle drill for tight corners, and a countersink bit set.
- Screws in multiple lengths: 2.5-inch for framing, 1.25-inch for cabinet-to-cabinet connections, and 3-inch for heavy face frames or panels.
- A stud finder that detects both wood and metal studs, and a pencil to mark locations.
Beyond the basics, consider a cabinet jack or a second person to help lift and hold boxes. A dead-blow mallet is gentle on cabinet faces and helps nudge boxes into alignment. For scribing, a compass or a scribing tool with a sharpened pencil works well. You will also need shims, which are the most important material in your kit. They correct every imperfection in the floor, wall, and ceiling. Never rely on a cabinet box to bend or warp into place; that creates stress on joints and door alignment.
For fasteners, use cabinet screws that are designed for the material. Coarse-thread screws grip wood studs firmly, while fine-thread screws are better for metal studs. If you hit a metal stud, you may need self-tapping screws or a pilot hole. Always pre-drill to avoid splitting the cabinet frame, especially near the edges. Use washers on the screws that pass through shims to prevent the screw head from pulling through the cabinet back.
Base Cabinet Installation Step by Step
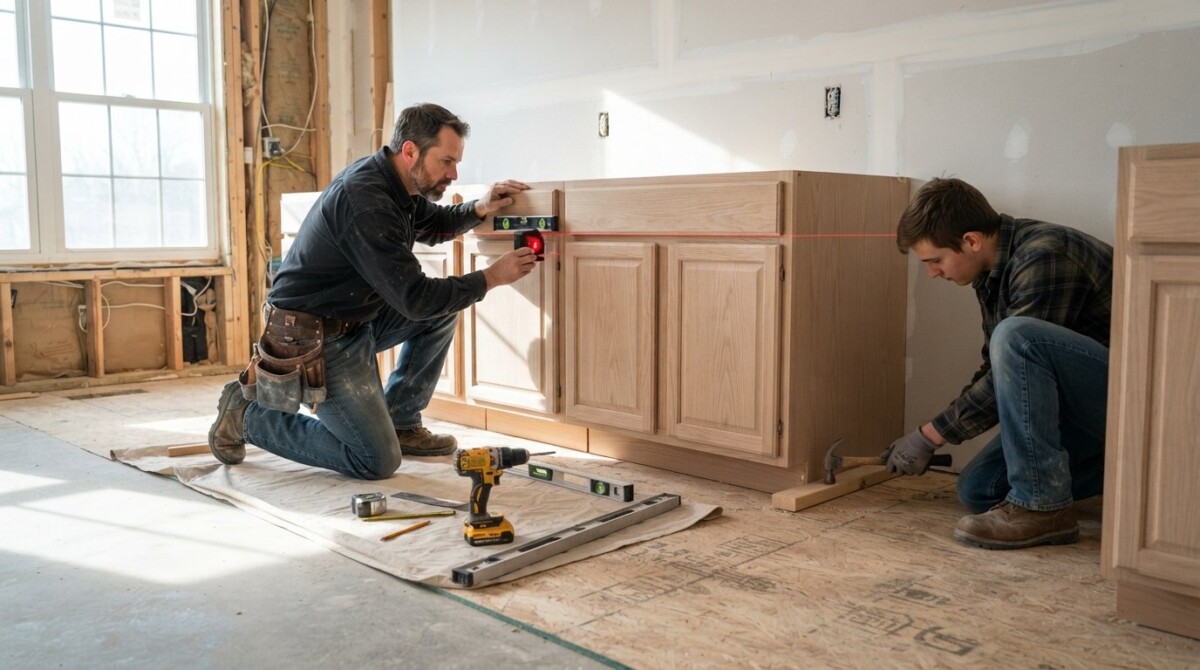
Base cabinets carry the countertop and must be both level and square to avoid gaps at the backsplash. Start by locating and marking all studs in the installation area. Use a stud finder, then verify by tapping or with a finish nail. Mark the stud centers with a pencil line that extends above the cabinet height. Next, dry-fit the first cabinet in the corner. If the floor dips, place shims under the cabinet to bring it to level. Check level front-to-back and side-to-side. The front should be your reference point, since the countertop sits there.
Once the corner cabinet is level, secure it to the wall. Drive screws through the cabinet back into the studs. Use the highest screw point that will be hidden by the countertop or a filler. For a sink base, you must avoid piercing the plumbing lines. Mark the pipe locations on the inside of the cabinet and drill clearance holes before setting the box. Do not rely on notches cut on site; they are often too small and cause binding.
After the first cabinet is anchored, place the next cabinet next to it. Clamp the face frames together or use a cabinet connector bolt for frameless boxes. Check that the front faces are flush. Use a straightedge across the faces to detect any twist. Adjust with shims behind the cabinet until the faces align. Secure the cabinets to each other with screws through the side panels, then anchor the second cabinet to the wall. Continue down the run, checking level and alignment at every joint.
For the final cabinet in a run, you may have a gap at the wall. A filler strip is the cleanest solution. Cut a piece of matching wood to the width of the gap, scribe it to the wall contour, and attach it to the cabinet side. This hides the gap and provides a finished edge. On outside corners, use a finished end panel or a scribe piece to cover the raw side of the cabinet.
Wall Cabinet Installation and Height Considerations
Wall cabinets are trickier because they are heavy, overhead, and often require a helper or a lift. The standard height above the countertop is 18 inches, but this can vary based on user height and appliance clearance. For a range or cooktop, check the manufacturer’s clearance requirements. Under-cabinet lighting and vent hoods also affect the placement. Always measure the actual distance from the countertop to the bottom of the cabinet, and mark the height on the wall with a laser level.
Start with a corner cabinet, just like with base units. But this time, you must also ensure the cabinet is level from side to side and front to back. The back of the cabinet should sit flush against the wall, but if the wall is not flat, you will see a gap at the top or bottom. Use shims at the top corners to bring the face plumb, then secure the cabinet to the studs with screws in the upper and lower back rails. Do not overtighten; the cabinet can twist.
When hanging multiple wall cabinets, a temporary ledger board is a wise strategy. Screw a straight 2×4 to the wall at the cabinet’s bottom height. This gives you a level shelf to rest the cabinets on while you secure them. It also takes the weight off your arms and reduces the risk of dropping a box. Once the cabinets are anchored, remove the ledger and patch the screw holes.
For upper cabinets that meet at an inside corner, the door swing is a critical detail. The hinge side of one cabinet must not block the door of the adjacent cabinet. Plan the door swing before installation. If necessary, order a filler or use a blind corner cabinet with specialized hardware. For outside corners, a finished end panel or a 45-degree angle connector creates a clean transition.
Aligning Doors, Drawers, and Hardware
Once all cabinets are hung and secured, the real finish work begins: aligning doors and drawers. This is where homeowners notice the craftsmanship. Start by adjusting the hinges. Most modern hinges have three adjustment points: up/down, left/right, and in/out. Use a screwdriver or a hex key to fine-tune each door. The goal is a consistent 1/8-inch gap between doors and a flush face with the cabinet frame. Work from the top down, and check the gap at every corner.
Drawers are a bit more complex. Full-extension slides have adjustment screws that allow vertical and horizontal tweaks. If a drawer is not sliding smoothly, check the slide alignment, not just the drawer face. Loosen the slide screws slightly, reposition the drawer, and retighten. A common mistake is to force a drawer into place, which bends the slides and causes permanent misalignment. Patience here saves hours of future service calls.
Finally, install the handles and knobs. Use a template or a consistent measurement from the door edge to ensure uniformity. A misaligned handle can ruin the look of an otherwise perfect cabinet. For base cabinets with a toe kick, install the toe kick cover and adjust the leveling legs if the floor is uneven. A small gap at the bottom is fine; it is hidden by the toe kick trim.
Common Cabinet Installation Mistakes to Avoid
Even experienced contractors make mistakes, but the best ones learn to avoid the most costly ones. Here are the pitfalls we see most often on job sites:
- Skipping the stud finder and using drywall anchors. This is the fastest way to a cabinet that pulls away from the wall.
- Not leveling the base cabinets before attaching the countertop. A small tilt becomes a visible gap at the backsplash.
- Overtightening screws, which can crack the cabinet frame or strip the pilot hole.
- Ignoring plumbing and electrical stub-outs. A pipe in the wrong spot can force you to cut a cabinet box and weaken it.
- Failing to scribe cabinets to an uneven wall. The gap may be small, but it is the first thing a homeowner sees.
Each of these mistakes leads to rework, which eats into your profit. The best defense is a methodical approach: measure, level, and anchor to structure. If you hit an unexpected obstacle, stop and reassess rather than forcing the cabinet into place. A few extra minutes of planning can save an hour of reinstallation.
Another common issue is ordering the wrong size cabinets. Always double-check the rough opening width and height, including any trim or molding. A 36-inch cabinet is not always 36 inches wide; it might be 34.5 inches plus a filler. Know the exact dimensions of the cabinet you are installing, and measure the space to the nearest 1/8 inch.
Working With Lead Generation Services for Steady Work
Cabinet installation is a skill, but running a business around it requires a steady stream of projects. Many contractors struggle with feast-or-famine cycles. When the phone rings, you are buried; when it goes quiet, you are worried. This is where lead generation services can make a real difference. Platforms like HomeRemodelingLeads connect you with homeowners who are actively searching for remodeling services, including kitchen and bathroom renovations. Instead of spending hours on cold calls or expensive advertising, you can buy pre-qualified leads that match your service area and project type.
For a cabinet installer, this means you can fill gaps in your calendar without the guesswork. You know the homeowner is interested because they submitted a request through the platform. You can review the job details and decide if it is a good fit. This targeted approach reduces wasted time and increases your close rate. It also helps you plan your material orders and labor more accurately, which directly improves your bottom line.
If you are new to lead buying, start small. Purchase a few leads in your local area to test the response rate. Track how many convert to paid jobs and compare that to your other marketing channels. Many contractors find that lead generation offers a better return than traditional advertising because you only pay for interested prospects. Just be sure to follow up quickly. A lead that sits for a day may already have hired another contractor.
Combining a solid installation process with a reliable lead source is a winning formula. You spend your time doing what you do best: installing cabinets with precision. The lead service handles the demand side. That is how you grow a remodeling business in a competitive market.
Final Inspection and Client Handoff
Before you leave the job site, do a final walkthrough. Open every door and drawer. Check for smooth operation and consistent gaps. Look at the alignment from a few feet away, not just up close. Use a level to confirm the countertop is flat and the cabinets are plumb. Inspect the scribe moldings and filler strips for any gaps. Touch up any scratches or dings with matching touch-up paint or marker.
Clean the cabinets inside and out. Remove sawdust and debris from the drawers and shelves. Wipe down the faces with a soft cloth. This is the moment the homeowner will remember, and a clean job leaves a lasting impression. Walk the homeowner through the features: soft-close hinges, pull-out shelves, and any custom details. Show them how to adjust the hinges if a door drifts over time. This reduces future calls and builds trust.
Hand over any warranty documents and the manufacturer’s care instructions. If you offer a workmanship warranty, explain it in writing. A simple one-page document with your contact information and warranty terms protects both you and the client. Finally, ask for a review or a referral. A satisfied customer is your best marketing tool. With a lead service like HomeRemodelingLeads, you can also request that the homeowner leave a review on the platform, which boosts your profile for future leads.
Cabinet installation is a craft that rewards precision and care. From the first measurement to the final hinge adjustment, every step matters. By following a proven process, avoiding common mistakes, and using smart business tools like lead generation, you can deliver excellent results and grow your contracting business. The next time you are on a job site, take pride in the work. That is what turns a one-time project into a long-term client.
About the Author: Mason Caldwell